Open Assignments
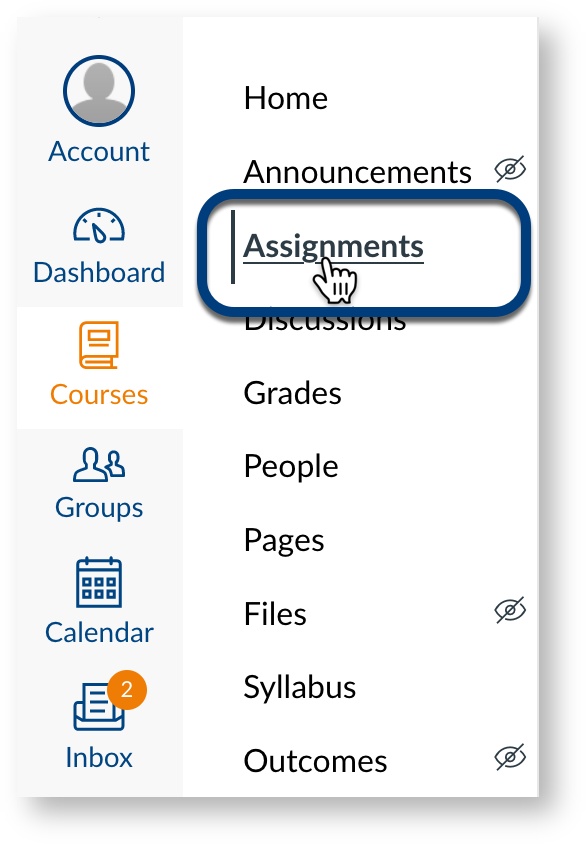
In Course Navigation, click the Assignments link.
Add Assignment
To create a new assignment, click the Add Assignment button.
Add Assignment Details
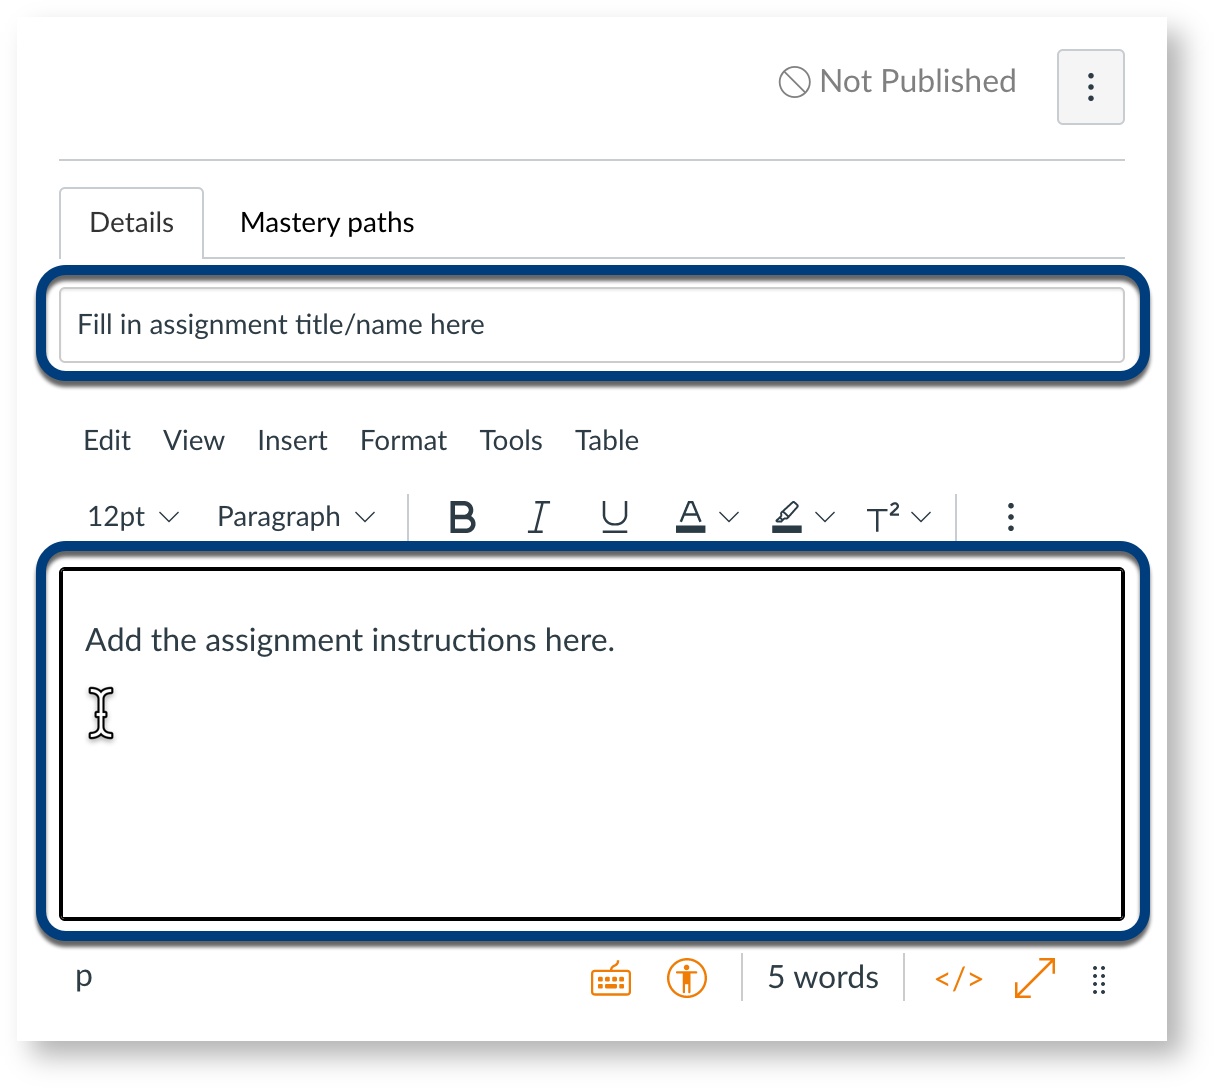
Fill in the Assignment name.
Use the text box to fill in assignment details and instructions.
Best practice
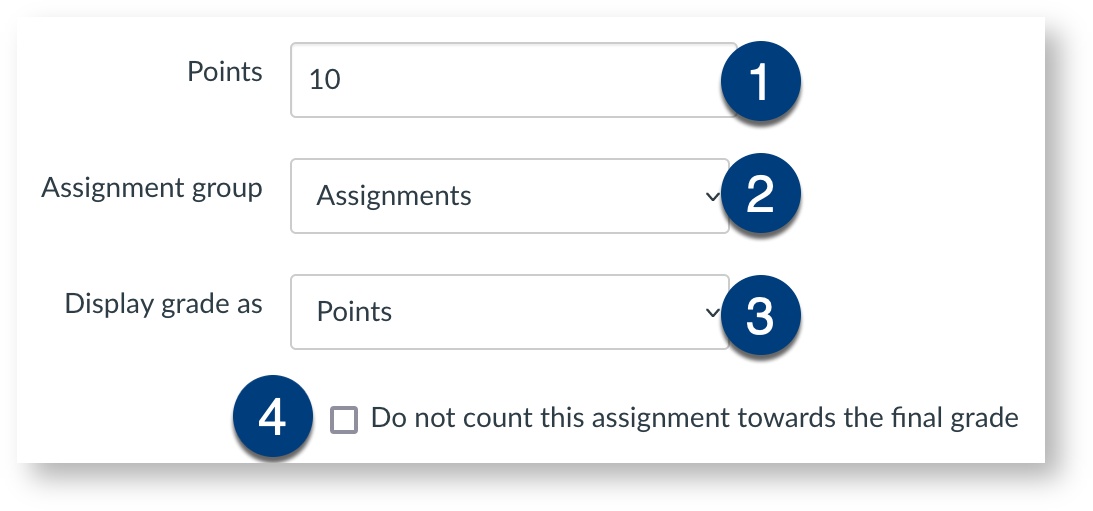
- Fill in the Points the assignment is worth.
- Select the Assignment group from the drop-down menu. You can create a new Assignment group by selecting [ Create Group ], if needed.
- Select your Display grade as format from the drop-down menu.
- If applicable, check Do not count this assignment towards the final grade.
Configure Submission type
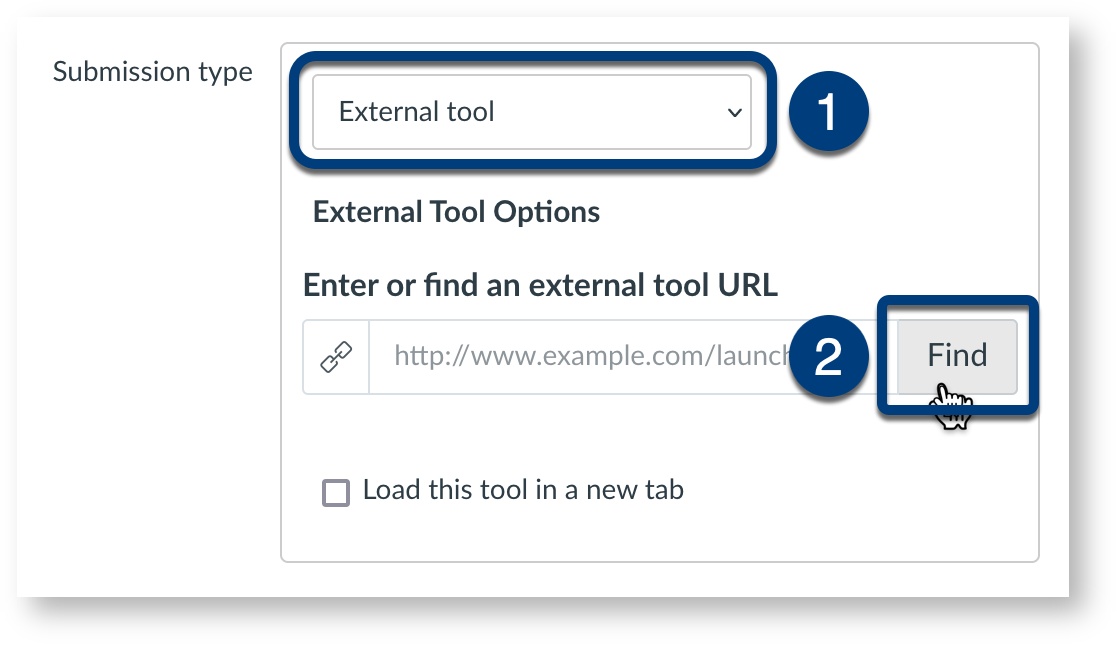
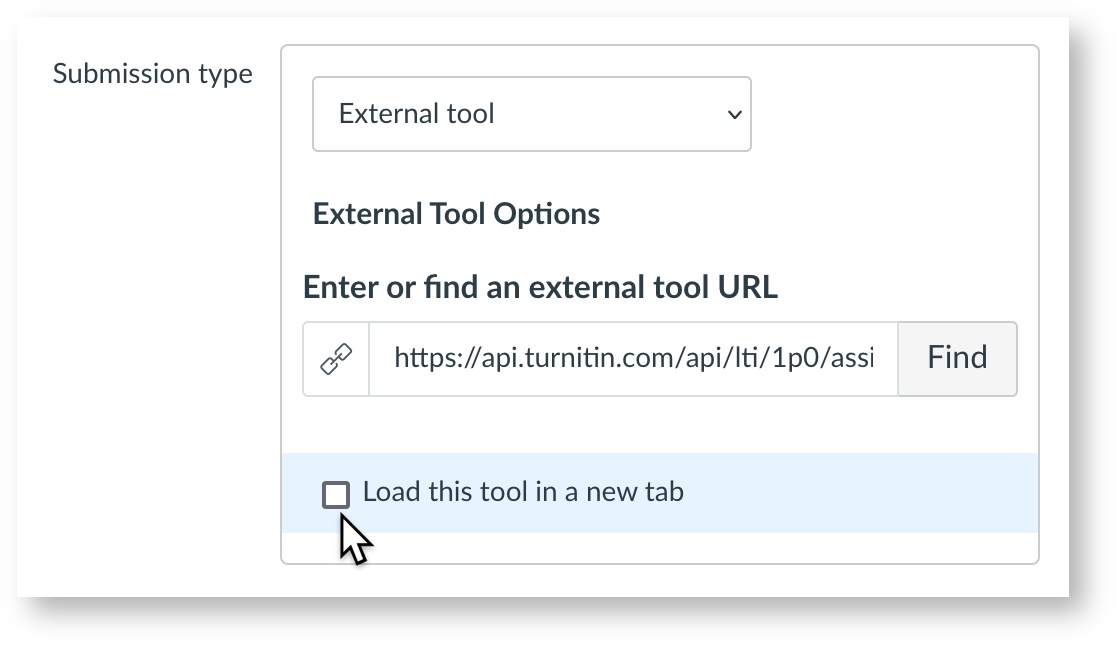
- For Submission type, select External tool from the drop-down menu.
- Click Find.
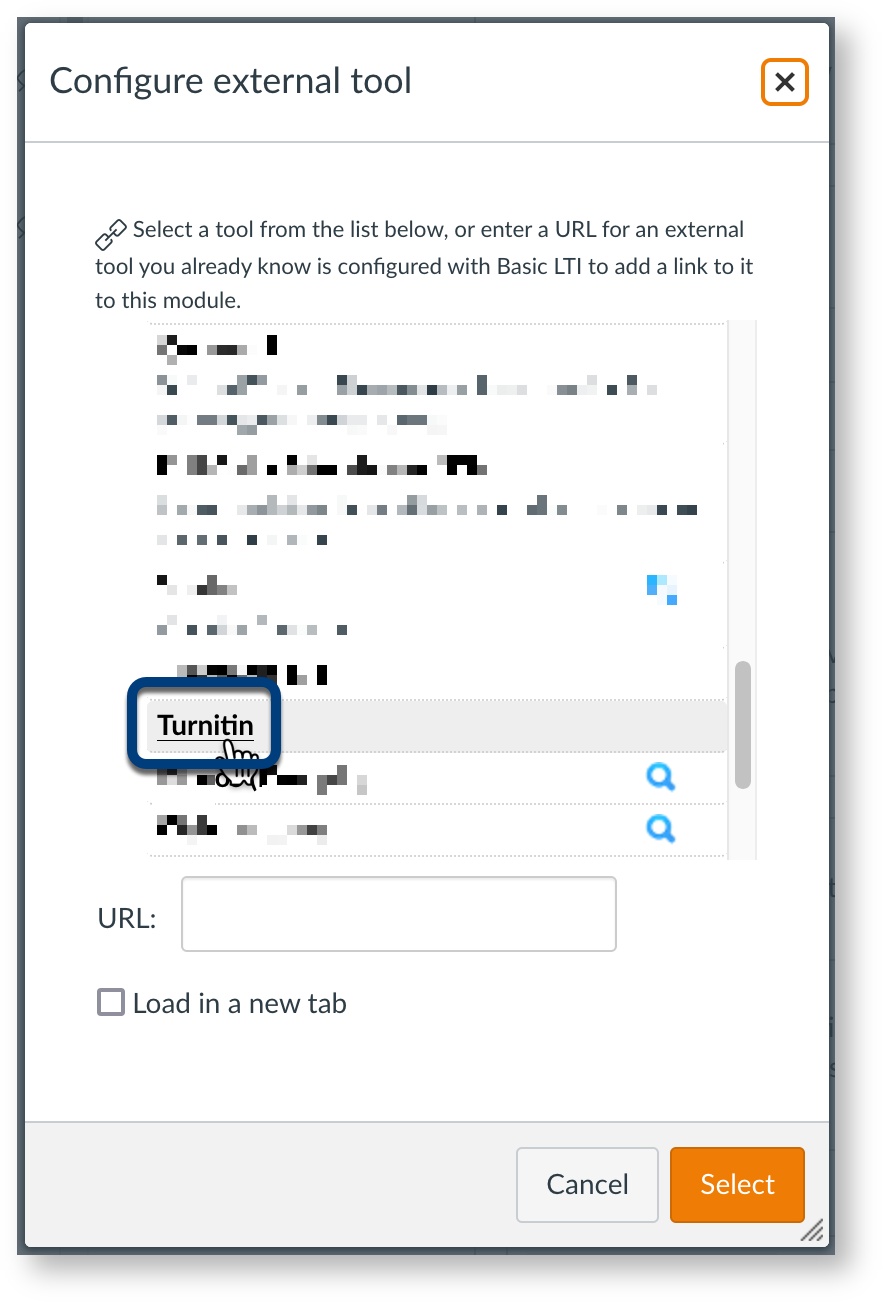
You will see a list displayed under Configure External Tool.
Scroll through the list to locate Turnitin.
Click Turnitin, then click Select.
If you want the Turnitin assignment folder to appear in a separate tab, check Load this tool in a new tab.
Info
Ignore the following sections
Potential pitfall
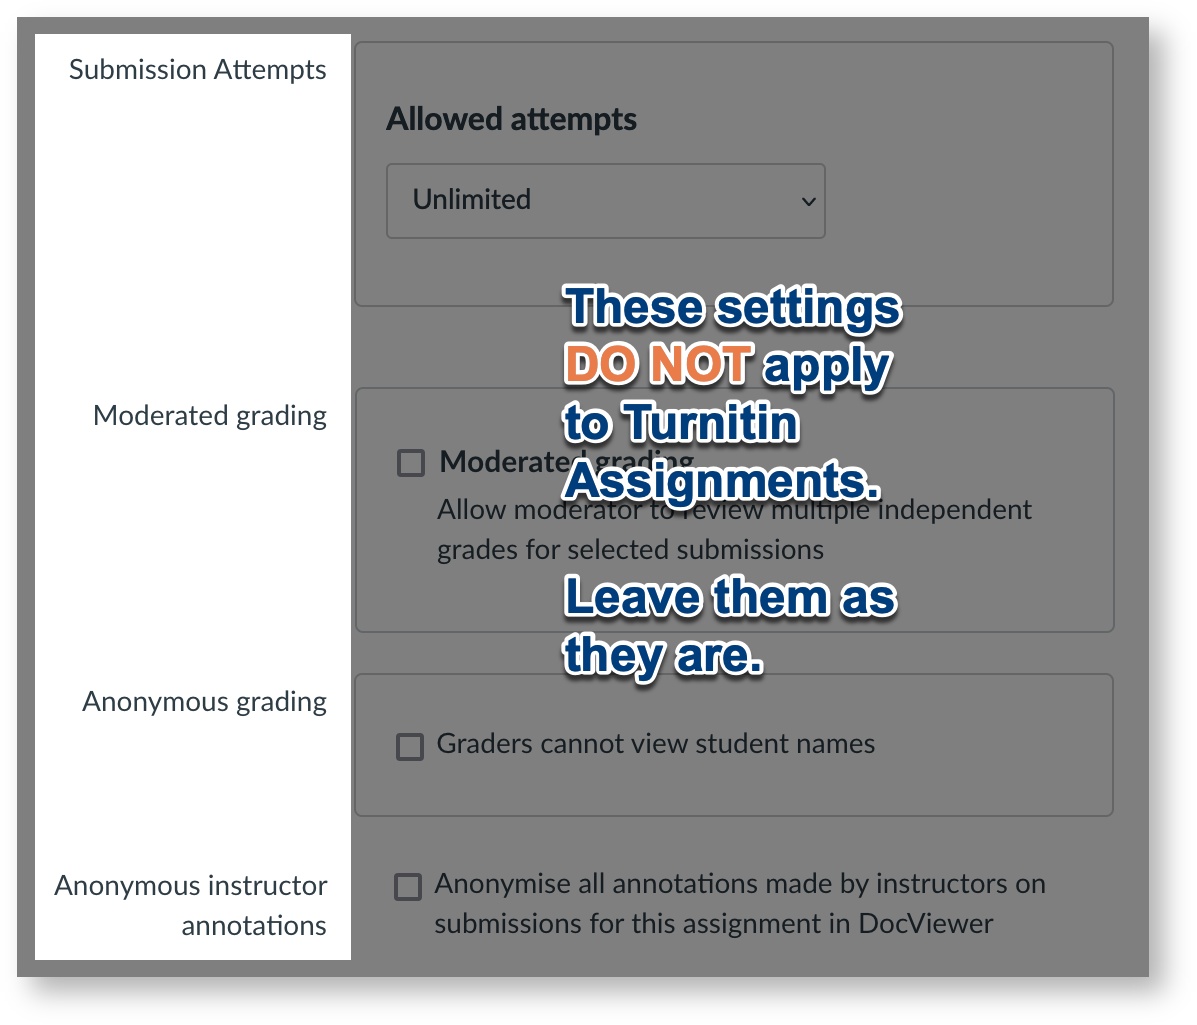
The following options do not apply to Turnitin assignments:
- Submission Attempts
- Moderated grading
- Anonymous grading
- Anonymous instructor annotations
If the equivalent features exist, they will be configured within the Turnitin assignment.
Assign & dates
Choose who to assign the Turnitin assignment to. By default, it is assigned to everyone in the Course.
You can assign the Turnitin assignment to a course section or an individual student. If you do so, take note of the caveat below.
Potential pitfall
- Click the calendar icon to select the Due date.
- Click the calendar icon to select the Available from date.
- Ignore the Until date.
Take note
Dates for Turnitin assignments
| Date order (from earliest) | Available from | Due | Feedback release | Until |
|---|---|---|---|---|
| Where to set | Canvas Assignment settings. | Canvas Assignment settings. | Turnitin assignment settings. | Canvas assignment settings. |
| Notes | Students can start submitting from this date. | Assignment deadline. Students cannot submit after this date, unless late submission is allowed. Late submission is configured in the Turnitin assignment settings. | Students can see your feedback/annotations (if any) from this date. | This is a hard close date, which you are not advised to set. If you set an Until date for Turnitin assignments, students will not be able to access the similarity report nor feedback on the assignment, if any, after this date. |
Save, then configure Turnitin assignment settings
Click Save.
You can click Save & Publish, but you are advised to configure the Turnitin assignment settings first.
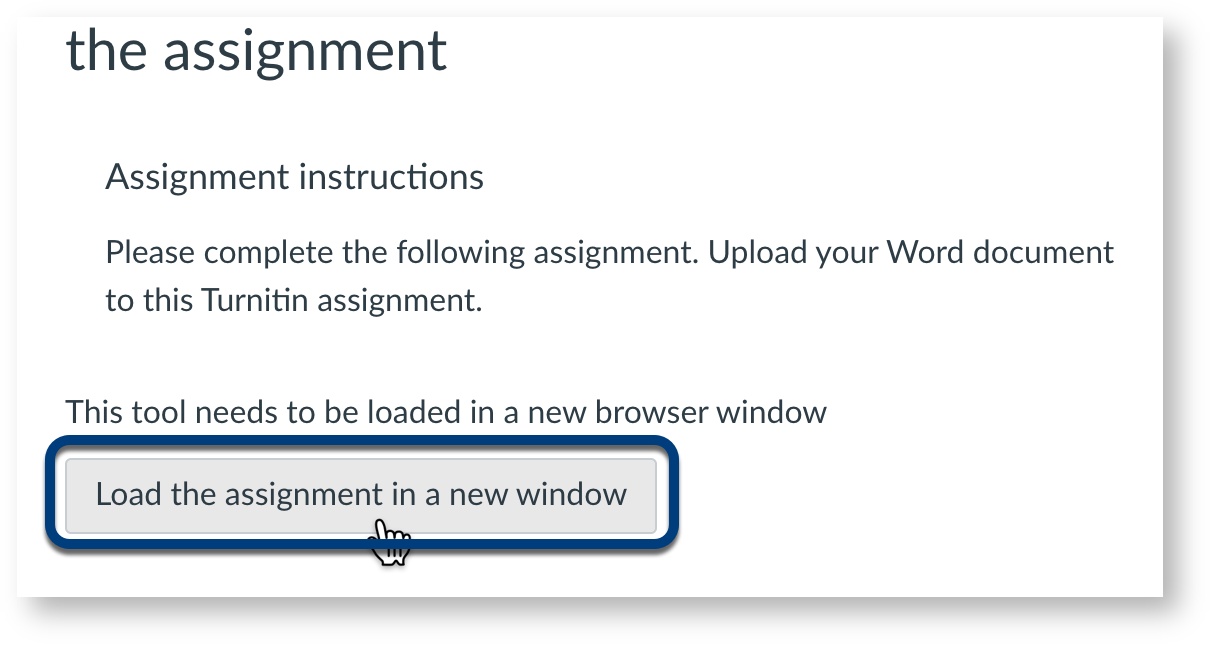
- If you checked Load this tool in a new tab (under Submission Type), click the button to load the Turnitin assignment in a new tab.
- If you did not check Load this tool in a new tab (under Submission Type), the Turnitin assignment folder should appear within the Canvas environment after you click Save.
Continue to configure the Turnitin assignment settings.
