/
Pre-assign Breakout Rooms
Pre-assign Breakout Rooms
Prerequisites
- Breakout Room is enabled in your meeting settings
- Host: Zoom Desktop Client on Windows or macOS, version 5.7.0 or higher
- Participants: Zoom Desktop Client or Mobile App, version 5.7.0 or higher
Note:- When joining a meeting with pre-assignments, ALL participants need to be signed in to their NUS Zoom account on the desktop client for pre-assignments to work.
Participants will not be placed in the pre-assigned room if they join from the web client.
Participants will not be placed in the pre-assigned room if the email does not match.
Check NUS Zoom Sign In and Email Address
- Click Sign in with SSO.
- Type in the company domain as: nus-sg and click Continue.
Limitations
- You can only pre-assign participants that have a Zoom account (internal or external Zoom users).
- When pre-assigning participants using the web portal, you can only pre-assign NUS Zoom users that are in the same account.
- To pre-assign participants that are external Zoom users, import a CSV file.
- If you have registration enabled and external participants register for the meeting, you need to assign them to breakout rooms during the meeting.
- Up to 200 participants can be pre-assigned to breakout rooms.
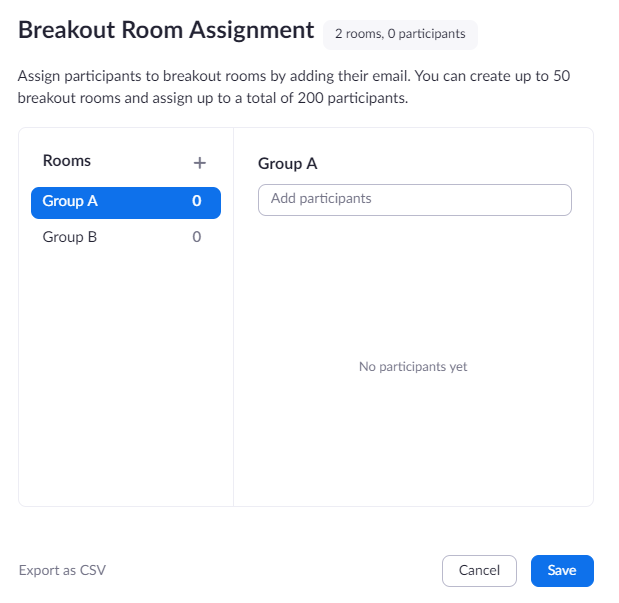
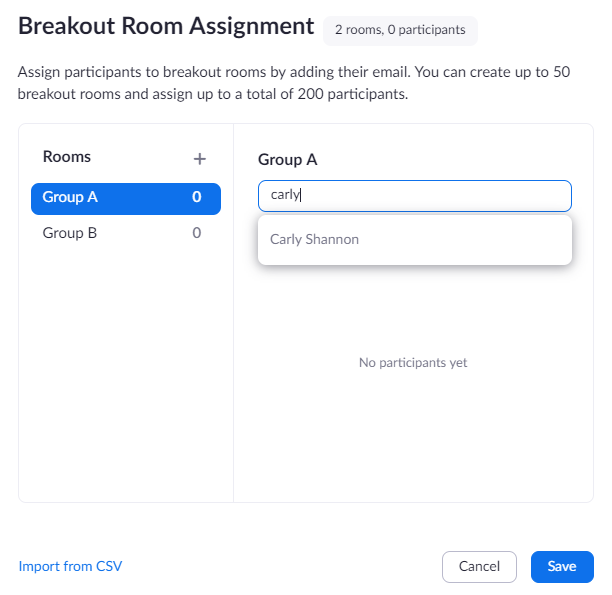
Pre-assign Breakout Room via the Web Portal
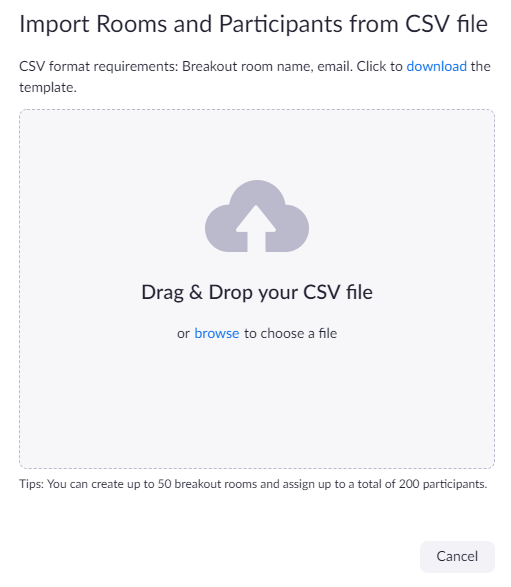
Pre-assign Breakout Room using the .csv file
, multiple selections available,
Related content
Allow participants to choose breakout room
Allow participants to choose breakout room
More like this
Cannot find some students while trying to assign them in pre-assigned breakout room
Cannot find some students while trying to assign them in pre-assigned breakout room
More like this
Zoom Rooms
Zoom Rooms
More like this
Can I schedule with Registration?
Can I schedule with Registration?
More like this
Securing Our Meetings
Securing Our Meetings
More like this
Only Authenticated users can join
Only Authenticated users can join
More like this


